Veränderungen des Inhalts
Klicken Sie für eine detaillierte Beschreibung auf die geänderten Stellen:
Benutzen sie die linke oder die rechte Maustaste, um zur jeweils vorherigen bzw. nachfolgenden Änderung zu gelangen.
General information
In
Overview
General
Under the menu item Persons you will find an overview of all created persons (employees) created for your client (company).
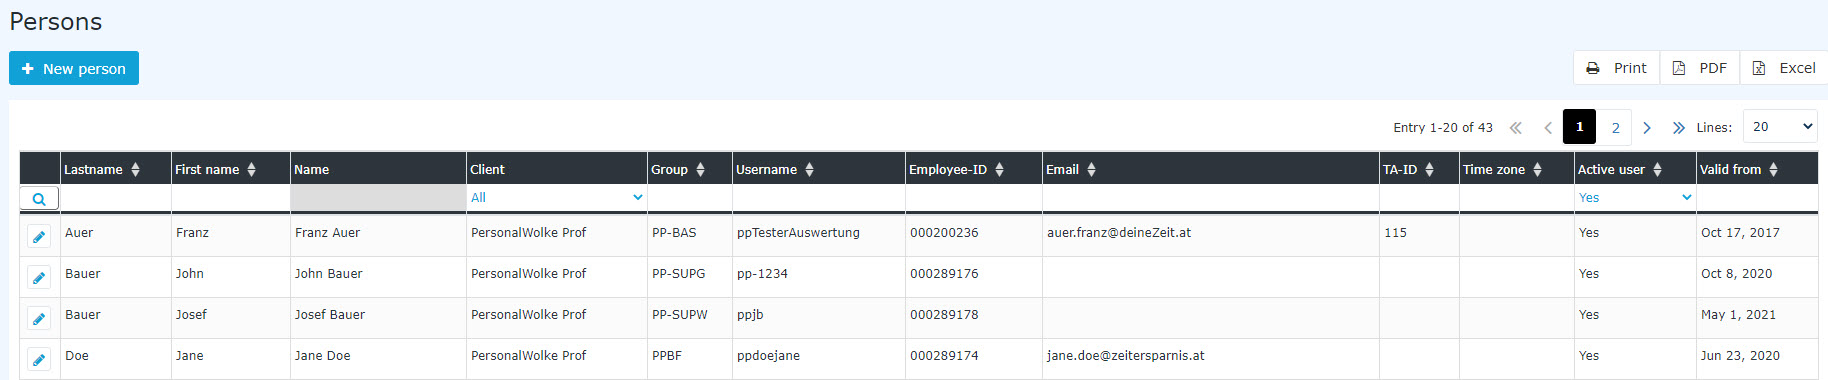
The list contains the following columns
-
Last name - the person's last name
-
First name - the person's first name
-
Name - combination of
surname
-
last name and first name
-
Client - the company the person is assigned to
-
Group - the group (department, organizational unit)
to which
-
the person is assigned to (e.g., support, personnel, management, quality assurance, etc.)
.
-
Username - the username (
incl.
-
including the fixed prefix pb) for
the login
webdesk Personnel
.
user-defined personnel
-
freely chosen employee number including the fixed company-specific prefix (in this case: 0001)
.
-
TA-ID - an ID for time tracking assigned automatically
assigned
for time recording
-
(cannot be changed)
-
Active user
-
Yes --> the person can log in to the Personalwolke portal
-
No --> the person can NOT log in to the Personalwolke portal, but
is still evaluable
Person master data sheet
A click on a line or on the edit symbol takes
-
can still be included in reports
In addition, certain role holders are identified in this list by colored badges so that they are easier to recognize.
In the example above, these are the badges for personnel (red) and for travel expense review (yellow).
The following roles are marked by badges:
-
Supervisor

-
Personnel

-
Travel expense review

The badges appear automatically in the persons overview as soon as an employee has received or inherited a role. They cannot be changed.
Person master data sheet
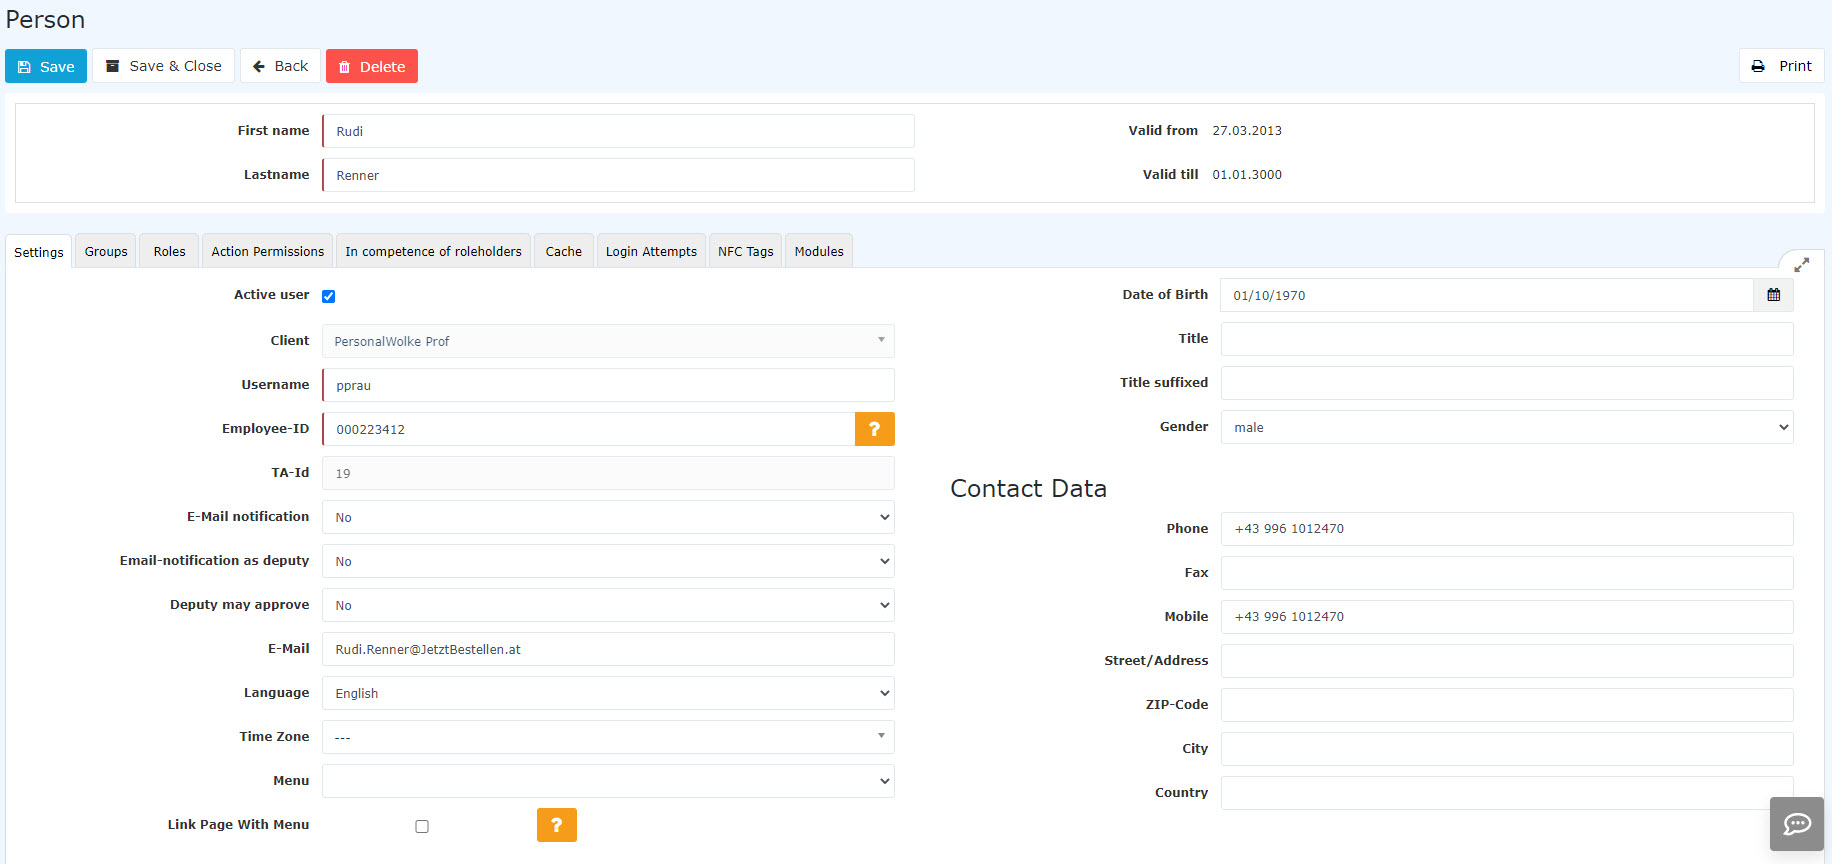
Clicking a row or the edit icon takes you to the person master data sheet, where data concerning the employee can be changed / the employee can be deleted. An explanation of the individual fields and tabs (tabs) can be found under New Person.
Sorting / Search
under "Create new person".
Extension for HR-Expert users
If you also have the HR-Expert program extension, you can switch directly from the person master data sheet to HR-Expert to make changes there.
You will find a corresponding "Edit in HR-Expert" button at the top of the view:

Sorting / search options
This list can be sorted freely in ascending or descending order, using the blue triangles and according to , by various criteria (last name, first name, group, user nameusername, personnel employee number, TA-ID, active, valid from).
In addition, the white text fields at the beginning of the list offer the possibility to let you restrict the displayed data records according to by various criteria, e.g.: Last , last name "gsren" shows only persons whose last names contain "gsren" (enter gs ren in the text field and start the search with Enter / Enter the Return key / click the Magnifying Glass-Symbolby clicking the magnifying glass icon). To make all records visible again, simply delete the search term from the corresponding field and press Enter again or click the magnifying glass icon.

Practical functions
By clicking Clicking one of the 3 icons (Print, PDF, Excel) in the upper right area , opens the following dialog box opens to specify , where you can specify in more detail the data to be displayed in the selected medium (Print, PDF, Excel):
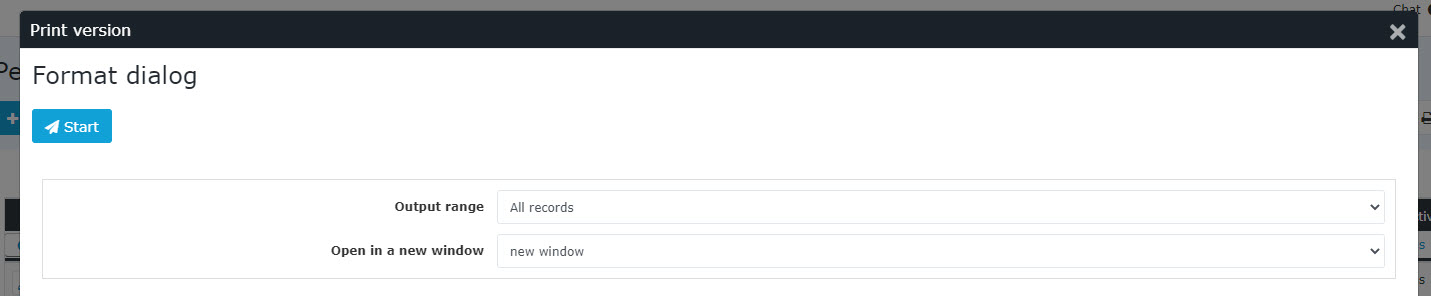
Output range
-
All Recordsrecords
All employees of the company are displayed in the selected output medium.
-
Current selection
Only the currently displayed employees of the company are displayed in the selected output medium.
Open in new window
-
new New window
The selected data sets records are displayed in a new window.
-
current Current window
The selected datasets records are displayed in the current window.
This function is also useful handy if you want to export a list of employees, possibly filtered according to by various criteria. The Excel format is ideal a good fit for this.

 erste


 Vergleiche Versionen 11 und 12

