Veränderungen des Inhalts
Klicken Sie für eine detaillierte Beschreibung auf die geänderten Stellen:
Benutzen sie die linke oder die rechte Maustaste, um zur jeweils vorherigen bzw. nachfolgenden Änderung zu gelangen.
Preconditions
Note: you can find how to create a new employee in Personalwolke Time under Administration/Persons in the menu tree or here.
Prerequisites
Before you create a new employee, you should answer the following questions for yourself:
-
In which Which department is the employee locatedin?
- Does this department already exist?
Which
-
What user name does will the employee get?
-
Which What employee ID does number will the employee get?
- Does the employee have a special function (role) in in the company (personnelHR, superiorsupervisor)?
- No: Continue with the next question.
-
Yes: Which one? Personnel HR or supervisor or both?
- Should the employee get additional menu items in Personalwolke?
- Employee / department administration -> Admin
- Additional evaluation options for employees --> Management
- Which time model (weekly programschedule) should be assigned to the employee?
Once you have answered these questions, you have gathered the minimum information required to create a person. You can also store other further personal data about the employee (date of birth, address, e-mail, telephone, etc.).
Create Creating the new employee
Step 1: In the menu tree under Administration, click on Persons.
Step 2: Click New Person above the list of people
Step 3: HR-Expert, select the employee view on the dashboard under HR or via the green employee icon

Step 2: Above the list of persons, click New person

Step 3: First name, last name, client, group, user name and employee ID and employee no. must be filled in. The checkbox Active user must also be checked if the employee is to should be able to log in to the webdeskPersonalwolke. All other fields are optional! (The fields user name and employee number are filled in automatically; you can overwrite the default entries after the client-specific prefix, in line with the naming convention chosen by your organization.
Note: The field for selecting the group is only available after the client has been selected. The fields user name and personnel number employee no. are also preset pre-filled with unchangeable, client-specific prefixes!
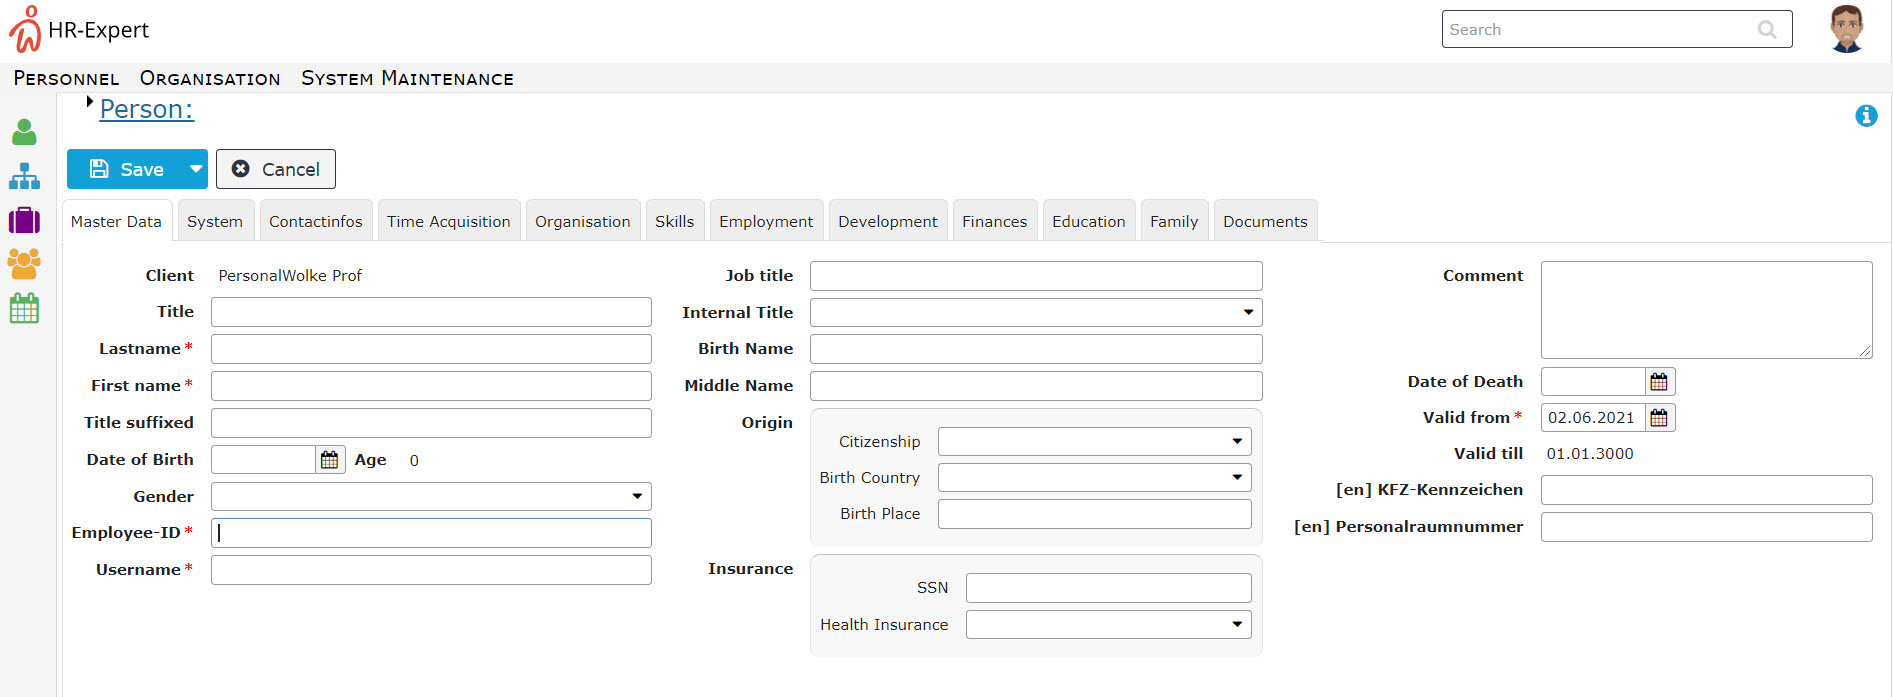
Step 4: Save Save
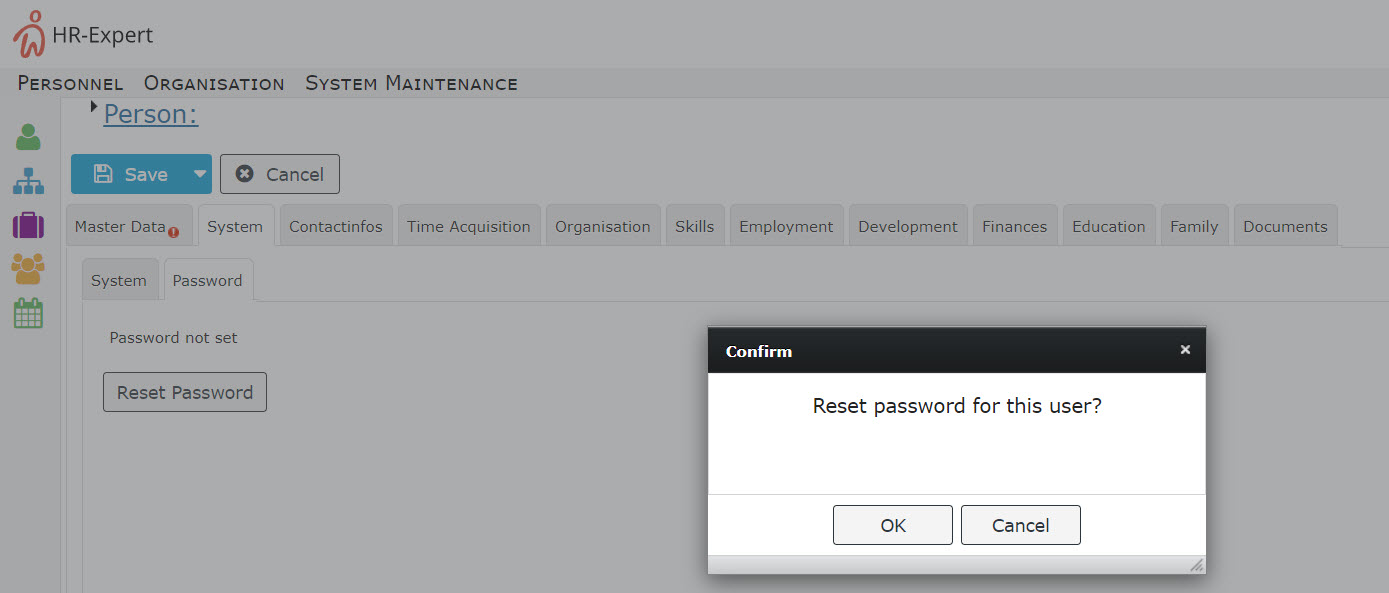
Step 5: To enable allow the user to log in, click on the Reset password button under the Password management tab. This resets the employee's password to his or her their user name (attentioncaution, upper/lower case relevantmatters!) and it must be changed during the first login.
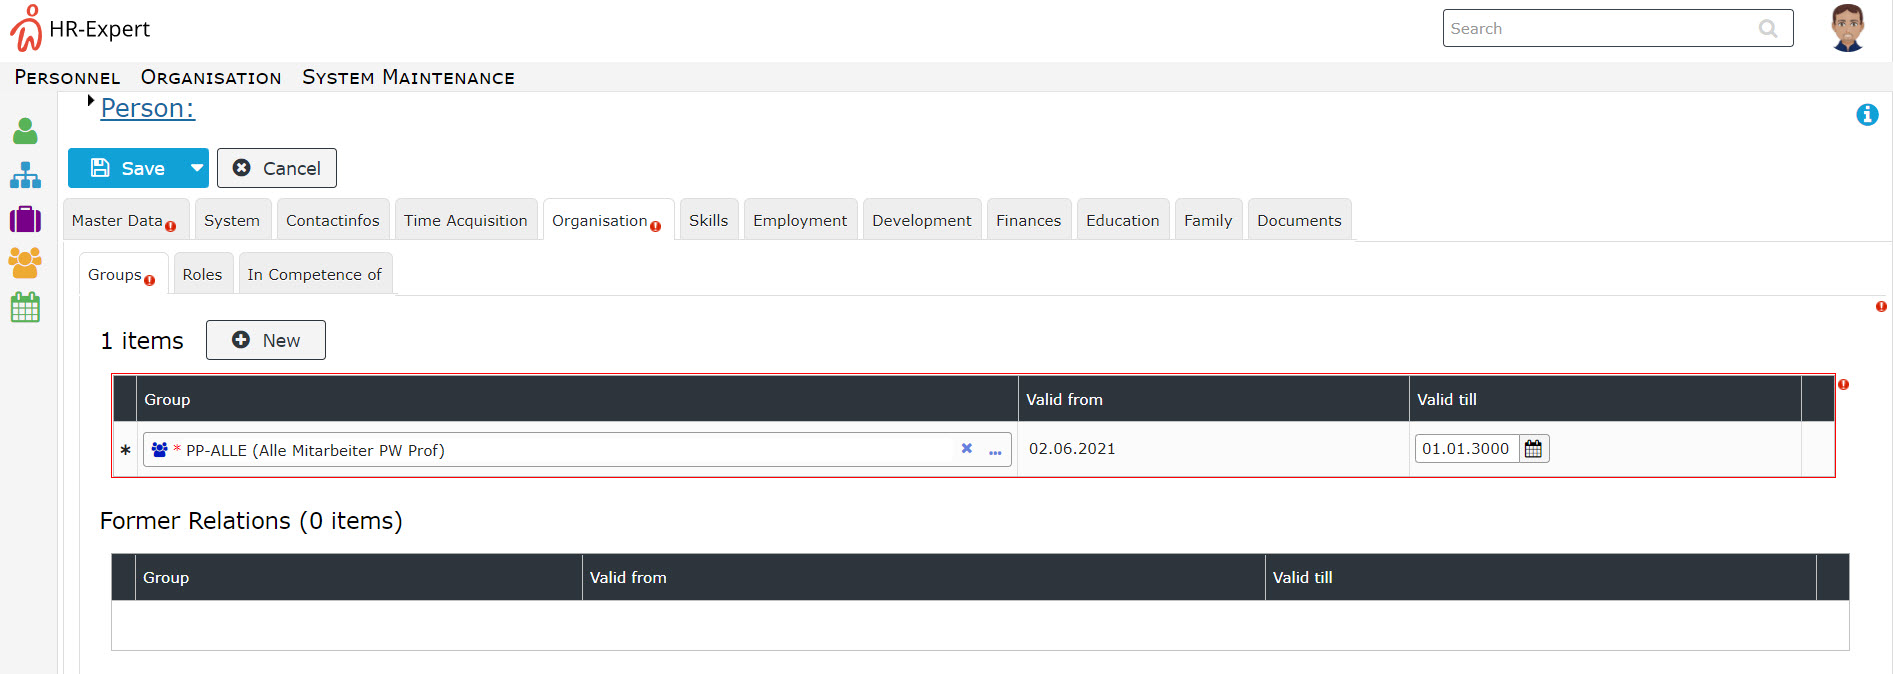
Step 6: Add the employee to lose group the permission group XX-ALLE.
In order to
ALL
To define the menu items that the employee can select after loginlogging in, the employee must be added to different lot various permission groups.
It is absolutely necessary to add the employee to the group XX-ALLEALL. This activates unlocks the basic menu items - without this setting, no navigation is possible in the webdeskPersonalwolke!
To do thisso, proceed as follows: under the tab Organisation Organization / Groups, Groups select the entry lose Permission groups from the drop-down menu dropdown and add the employee to the group XX-ALLE under ALL under New Groupgroup.
Step 7: Save
Steps 6 and 7 can now be repeated to also add the employee to the groups XX-Admin or XX-Management groups, if this the employee should be able to perform admin or management can exercise skills in the webdeskfunctions in Personalwolke.
The group XX-Admin is normally assigned to those employees who should be able to add / edit new persons in the webdesk Personalwolke or create / edit groups (departments) in the organization chartorganigram. The membership
Membership in the group XX-Management activates unlocks additional menu items for evaluations / statistics (usually assigned to personnelists HR staff / superiorssupervisors).
Step 8: Special properties for the employee (personnelHR, superior)
Special
supervisor)
Under the Roles tab, special functions can be assigned to the employee under the Roles tab. Specifically, these are the roles Personnel HR and Superiorssupervisor, which give the employee extended access rights (viewing permissions (a supervisor may, for example, a superior can view the monthly journal of his or her subordinate employeesthe employees reporting to them) and enable unlock additional menu items. The In addition, the two roles are also used in the various workflows (leave vacation requests, time corrections, etc.) to control who has to approve these requests.
To assign a role to an employee, proceed as follows:
- Select the Roles tab
- Click on New Role Ownerrole holder
- Under New Role Ownerrole holder, click on the button with the 3 points dots to select the role Personnel HR or Supervisor.supervisor
- Under competence Competence target
- Person: this specifies that the current employee performs exercises the selected role (personnelHR, superiorsupervisor) for the selected employee.
- Group: this specifies that the current employee performs exercises the selected role (personnelHR, superiorsupervisor) for the selected group (i.e. for all members of this group).
- Client: this specifies that the current employee performs exercises the selected role (personnelHR, superiorsupervisor) for the entire client (i.e. for all employees of the client; useful if, for example, if there is to be 1 HR manager for all employees).
- Valid from / to until: a period can be defined in which this role assignment is valid (can be left empty; then the assignment is then valid from now until 1.1.3000 (standard default setting)).
The settings made must be accepted with a click on applied by clicking Save. This step can be repeated as often as required needed in order to assign several roles to the employee for different competence goalstargets.
Step 9: Activating the employee in time recording tracking (for Personalwolke Time -Base / Personalwolke Time - Professional customers)
Entry of Setting up time tracking for new employees

 erste


 Vergleiche Versionen 7 und 8

